How to setup power monitoring virtual machine for VMware
Monitoring power consumption is essential for making smarter decisions, reducing costs, and promoting sustainability—whether you’re managing a data center, a smart home, or a renewable energy project. A power monitoring virtual machine (VM) simplifies this process by offering a centralized platform to collect, analyze, and visualize energy data.
In this blog, we’ll walk you through setting up a power monitoring VM, covering essential tools, software, and configurations to streamline your energy management. Let’s get started and optimize your setup!
Prerequisites
-
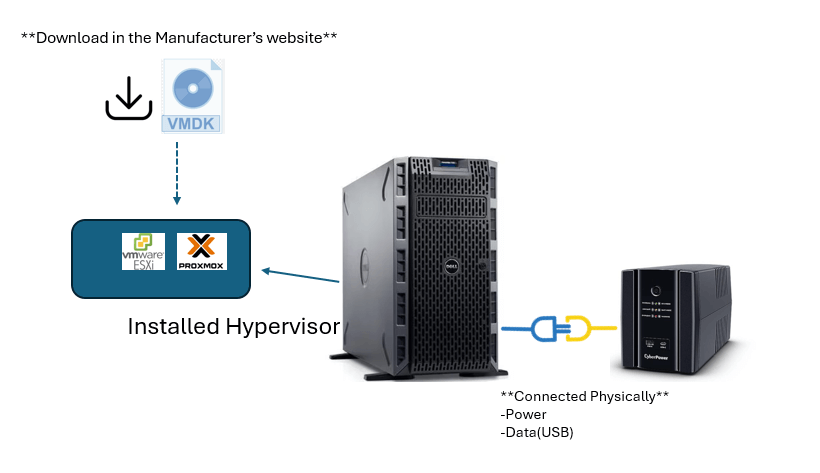
Virtual Machine Host You’ll need either VMware ESXi or Proxmox Virtual Environment installed on your server.
-
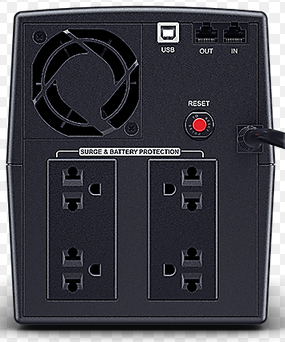
UPS (Uninterruptible Power Supply) Your UPS should have either a USB or Ethernet port for communication.
- Virtual Machine Image Typically downloadable from the manufacturer’s website, usually in .VMDK format.
System Overview
In this example setup:
-
We have a physical server connected to the UPS using both power and data via USB.
-
A hypervisor (ESXi or Proxmox) is already installed.
-
We’ll use the manufacturer’s utility image to deploy the power monitoring VM.
⚠️ Note: The monitoring system used in this guide supports VMware ESXi only.
Step-by-Step Setup Guide
-
Verify UPS Detection via SSH
- Login to your VMware host through SSH.
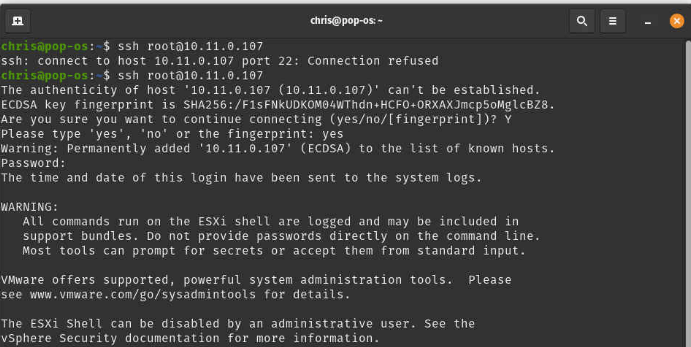
-
At the prompt, type
lsusb. This command will list all USB devices connected to your physical server.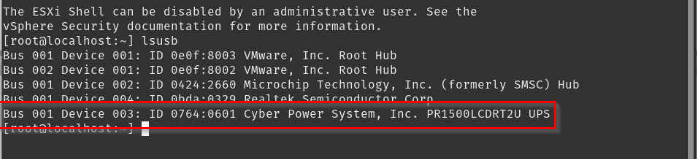
-
Download the VMDK image from the manufacturer’s website
For this example, the UPS manufacturer is Cyber Power Systems.
- If your UPS is connected via USB, download the first option.
- If your UPS is connected via the network, download the second (remote) option.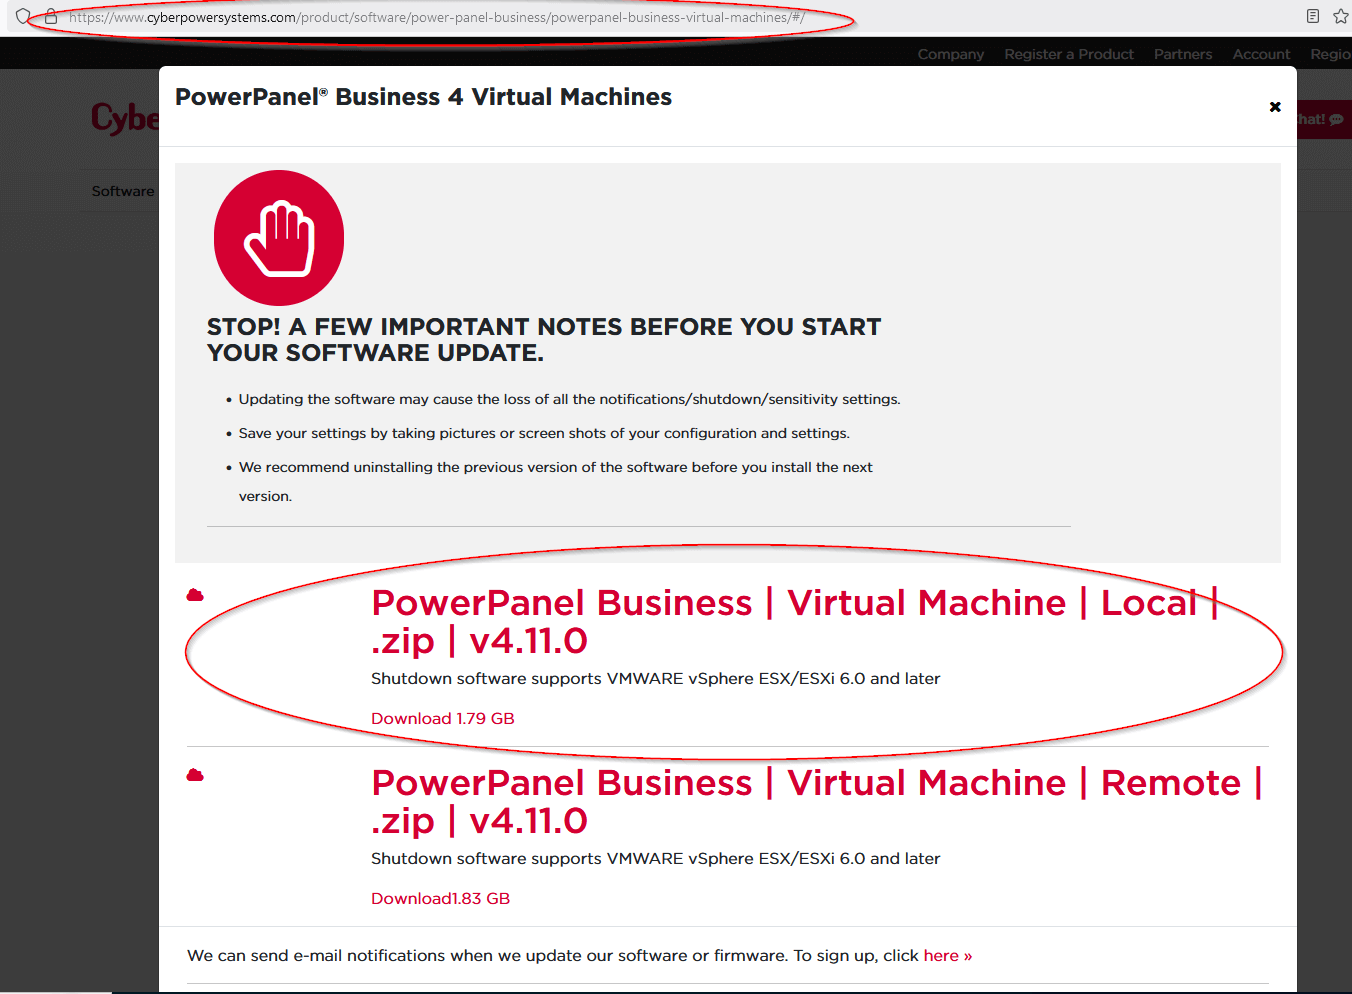
- After downloading
Unzip the file to extract the necessary image files. -
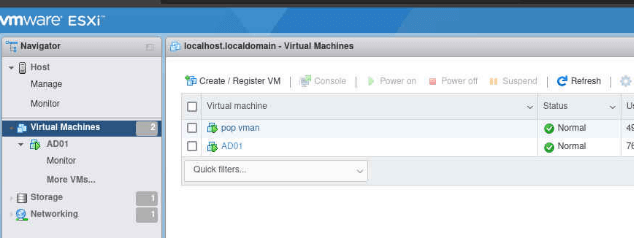
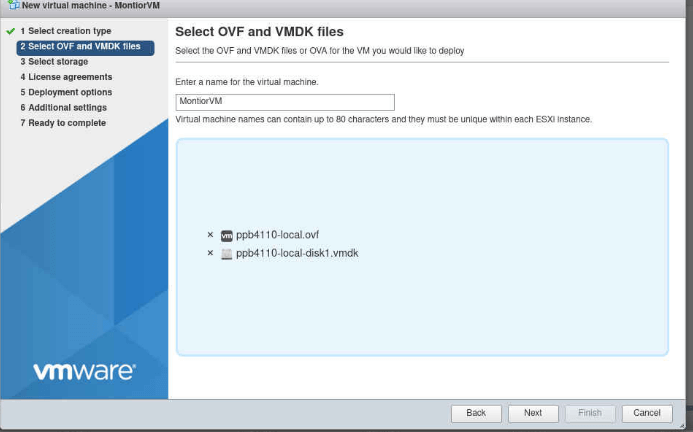
Login to the VMware web GUI and create a virtual machine.
Select Deploy a virtual machine from an OVF or OVA file, then click Next.
-
Enter the name of the virtual machine (e.g., MonitorVM).
- Drag and drop the.ovfand.vmdkfiles into the box.
- Click Next once they are loaded.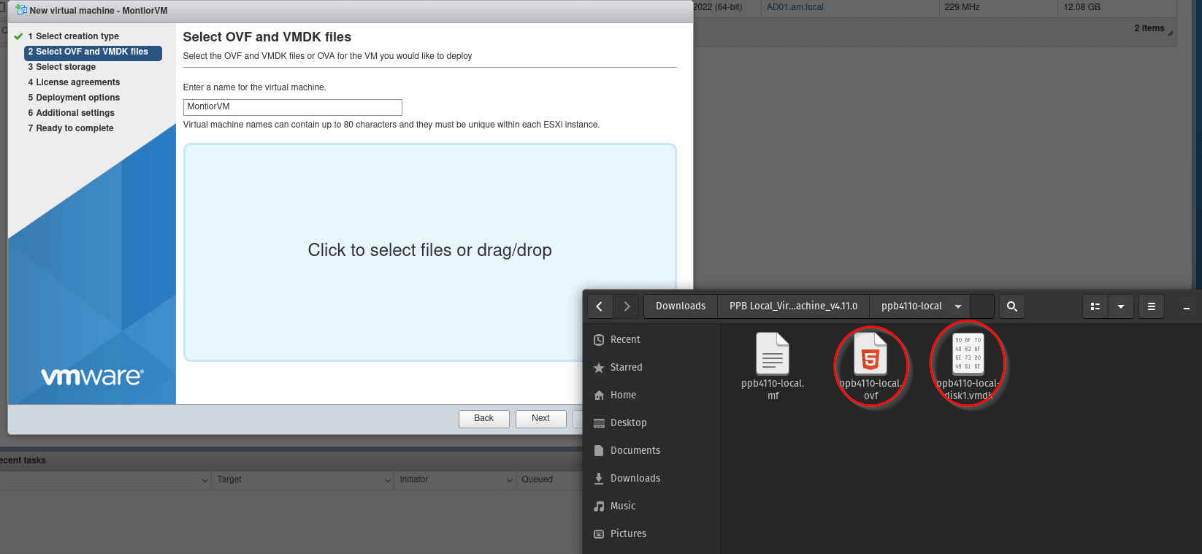
-
Choose the storage location.
For this example, we only have one option. Click Next.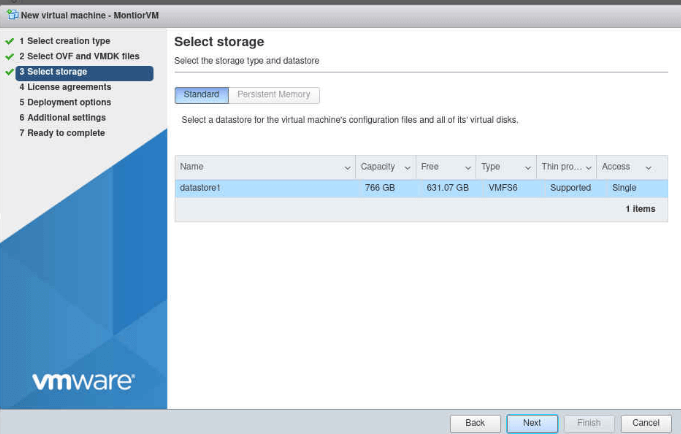
-
Select Thin Provisioning.
- Untick Power on automatically.
- Click Next.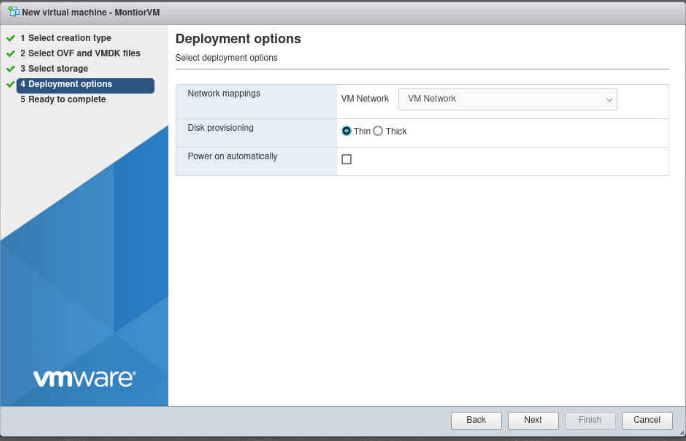
-
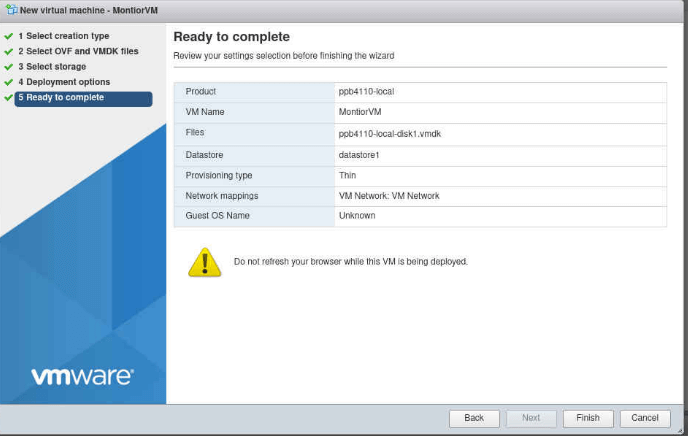
Review the configuration and click Finish.
-
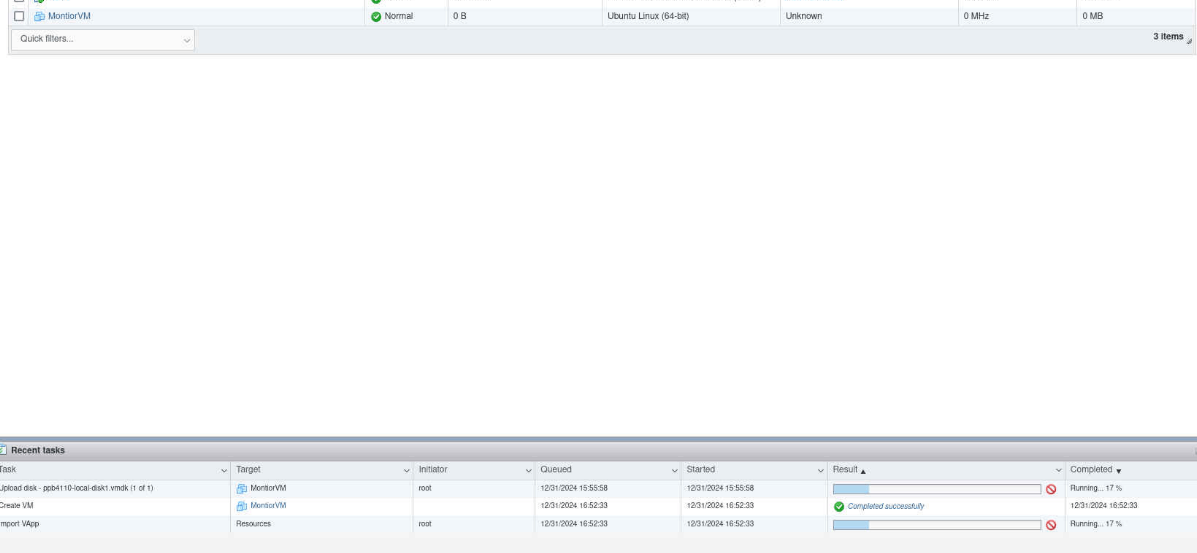
Wait for the virtual machine to finish creating.
-
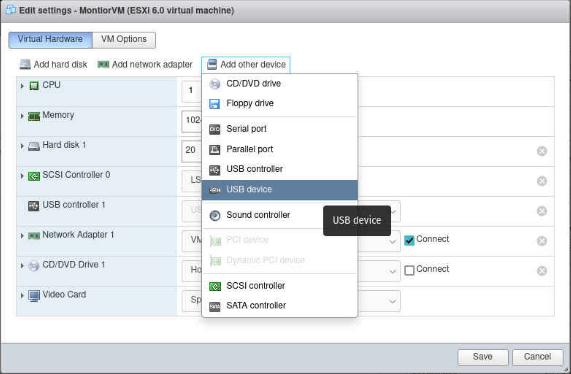
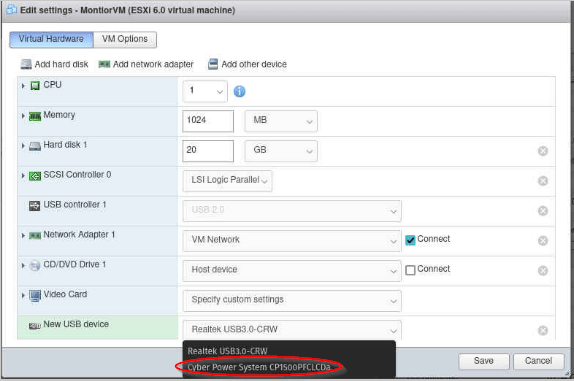
Configure the power monitoring VM.
- Add a USB device to the VM.
- Choose your UPS from the list.
- Click Save.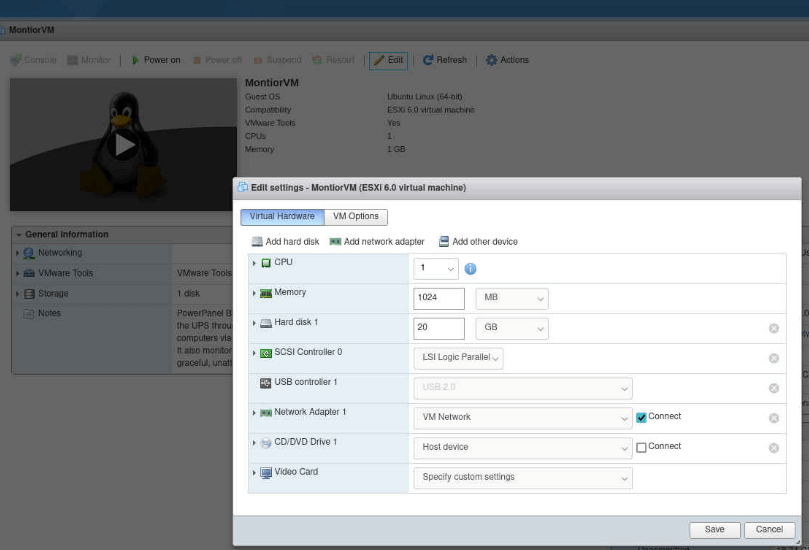
-
Turn on the virtual machine.
Take note of the IP address automatically assigned by ESXi.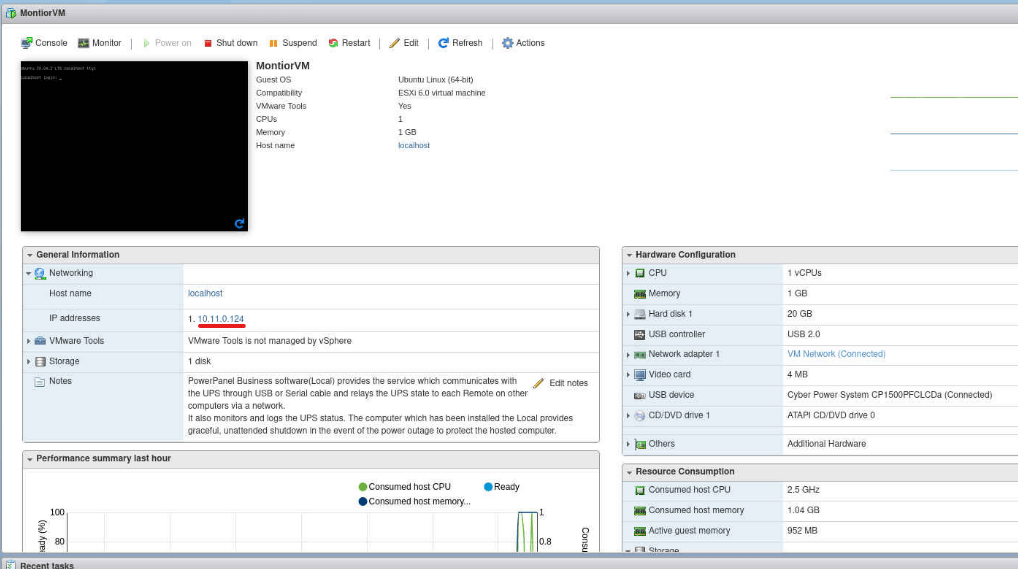
-
Access the web GUI.
Open a browser and enter the IP address with the correct port (e.g.,http://10.11.0.124:3052).
Refer to the manufacturer’s manual to determine the correct port.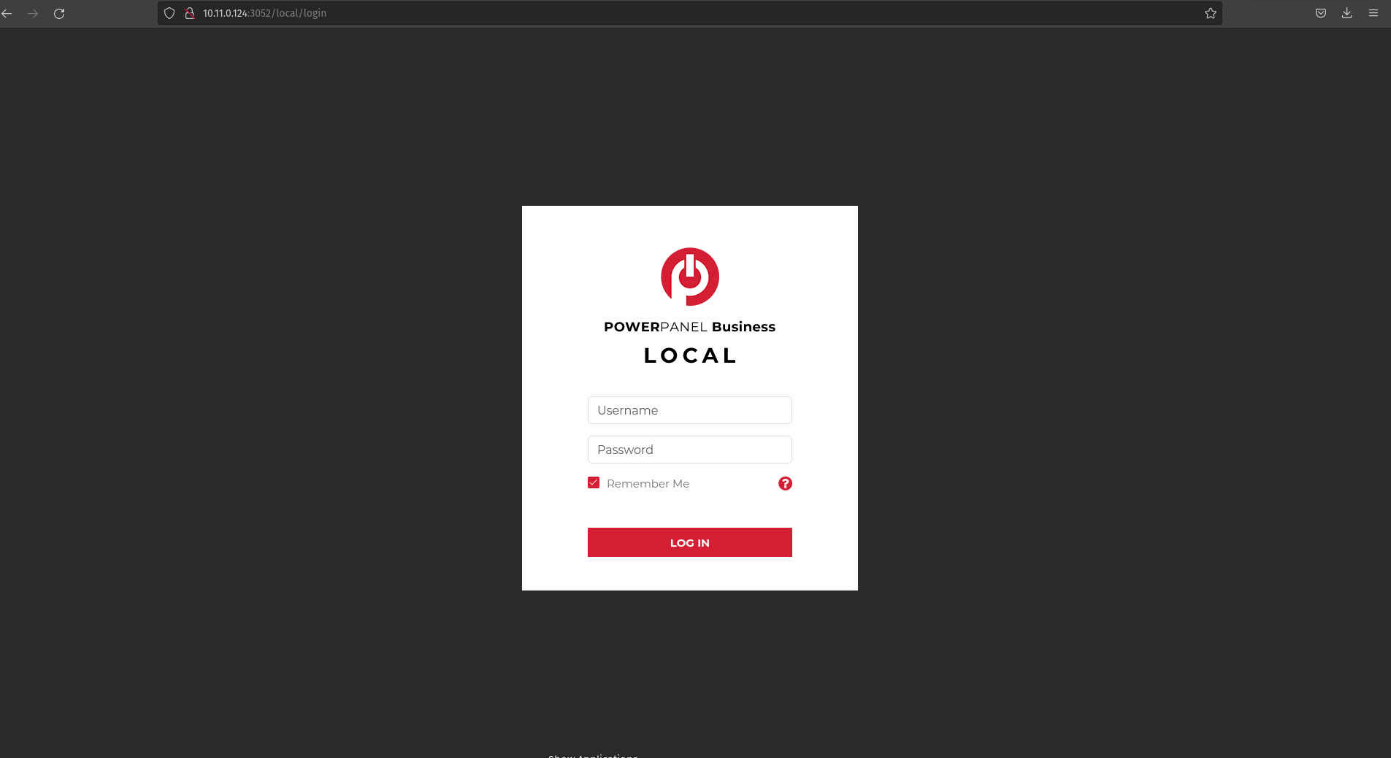

-
Change the default password (mandatory).
After clicking Save, you will be logged out and must log in again with your new password.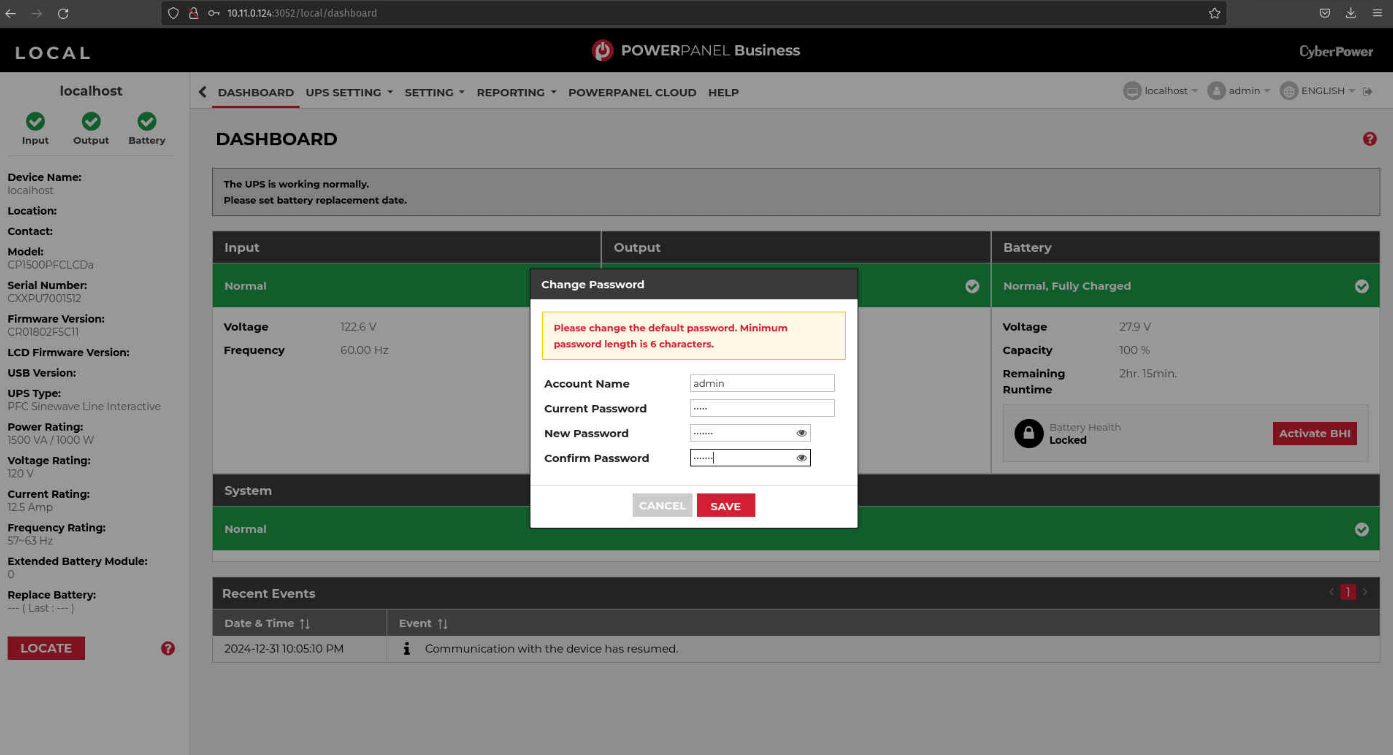

-
After logging in, you'll see complete UPS information on the left-hand side.
-
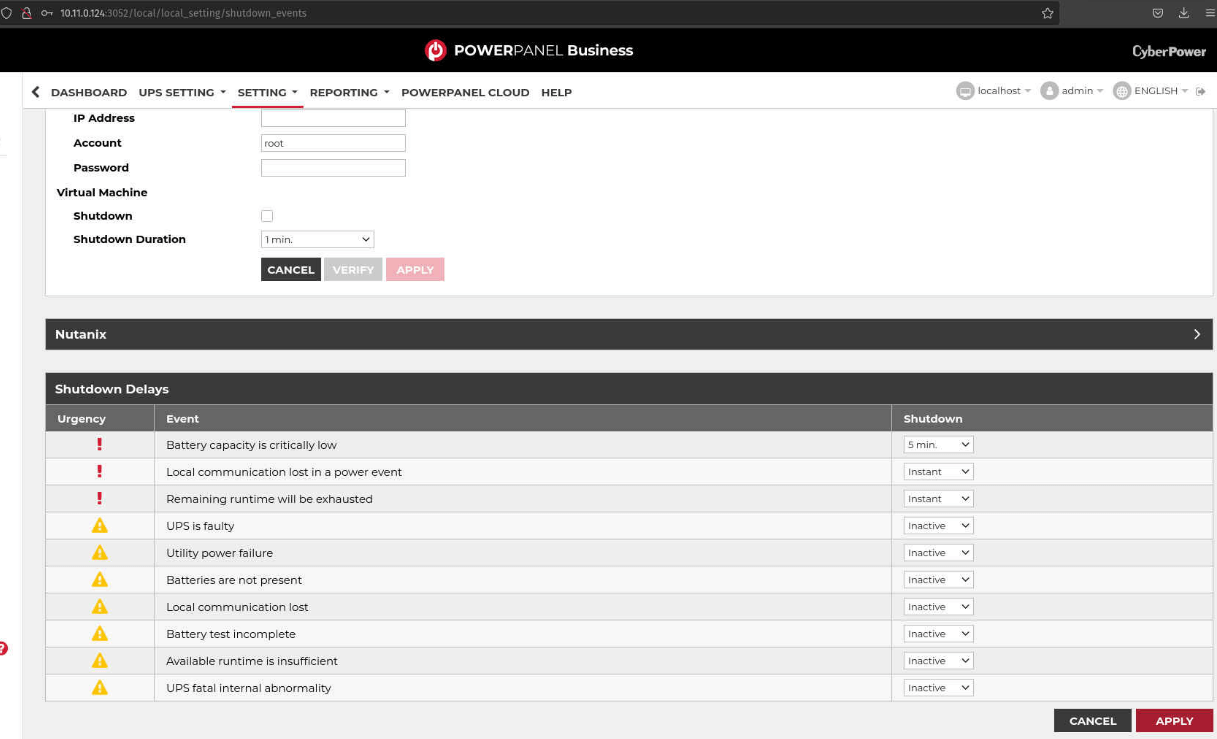
Configure shutdown settings.
Navigate to Settings > Shutdown Events.
- Verify connectivity to your ESXi server.
- Set your preferred shutdown duration and delay.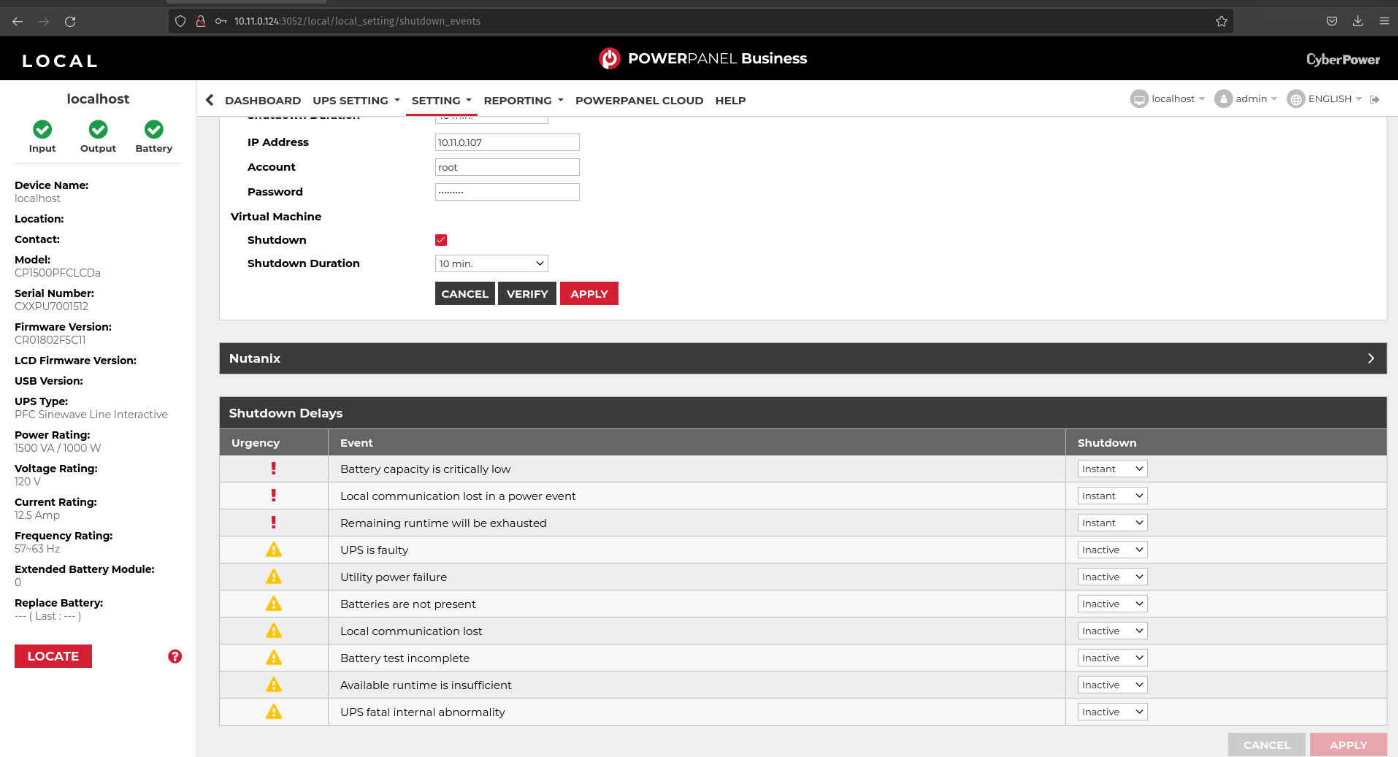
-
Click Apply to save your shutdown configurations.